How to Set-Up-and-Sharing-Network-Drives-Using-Group-Policy Link to heading
Setting up and sharing a network drive can streamline access to resources within your organization, making file sharing more efficient and secure. Whether you’re a small business or a large enterprise, leveraging Group Policy in Windows allows you to manage these shared drives centrally. This guide will walk you through the process step-by-step.
Step 1: Create a Shared Folder Link to heading
The first step is to create a folder on your file server that will be shared among users. You can name this folder based on its purpose, such as “MarketingShare” or “ITDocuments”. Here’s how you can do it:
-
Create the Folder: Right-click anywhere in your desired location on the file server, select “New” and then “Folder”. Name the folder accordingly.
-
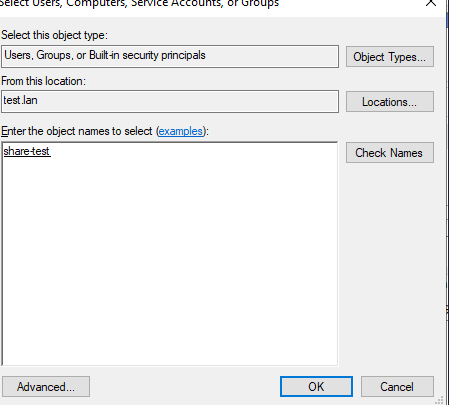
Set Sharing Permissions: Right-click the folder, select “Properties”, then navigate to the “Sharing” tab. Click “Share”, then choose “Find people” from the drop-down menu. Enter the names of the users, groups, or organizational units (OUs) that you want to grant access to this shared folder.
-
Advanced Sharing: Click on “Advanced Sharing”, then “Permissions”, and finally “Add”. Enter the names of users or groups you want to give access to this shared drive. Configure permissions (e.g., Read, Write, Full Control) as needed.
Step 2: Implement Group Policy for Drive Mapping Link to heading
Now that you’ve set up the shared folder, you can use Group Policy to automatically map this drive for users within specific OUs in your Active Directory.
-
Open Group Policy Management: On a domain controller or a computer with Group Policy Management installed, open “Group Policy Management Console”.
-
Create a Group Policy Object (GPO): Navigate to the Organizational Unit (OU) where your users are located (e.g., Marketing, IT, HR).
-
Configure Drive Mapping:
- Under User Configuration, expand “Preferences” and then “Windows Settings”.
- Right-click on “Drive Maps” and select “New” > “Mapped Drive”.
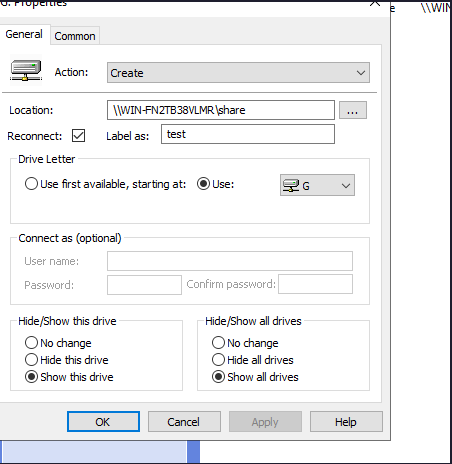
- In the Mapped Drive Properties:
- Set the Action to “Create”.
- Enter the path to the shared folder in the “Location” field.
- Check “Reconnect” to ensure the drive reconnects at login.
- Optionally, set an alias for the share in the “Label as” field.
- Choose a drive letter and ensure “Show this drive” and “Show all drives” are selected.
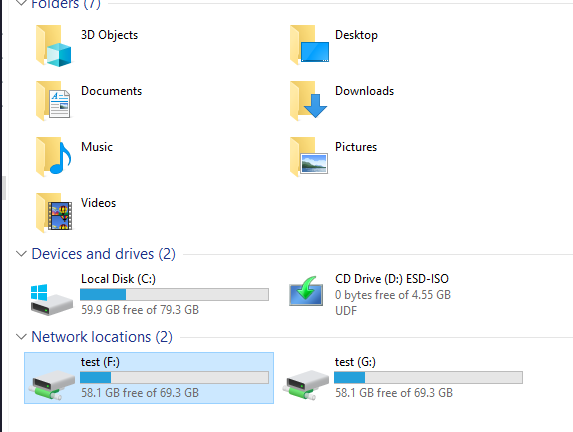
- Apply and Verify: Once configured, link the GPO to the appropriate OU containing the users. Ensure that the policy applies correctly by logging in as a user within that OU and verifying if the mapped drive appears.
Conclusion Link to heading
Setting up and sharing network drives using Group Policy simplifies access management and enhances productivity by ensuring users have seamless access to necessary resources. By following these steps, you can efficiently deploy shared drives across your organization while maintaining security and access controls.
Implementing these practices not only improves workflow efficiency but also ensures that your organization’s resources are accessed securely and reliably.